Photold
How to Remove Scratches from Old Photos
By the Photold team · · 6 min read
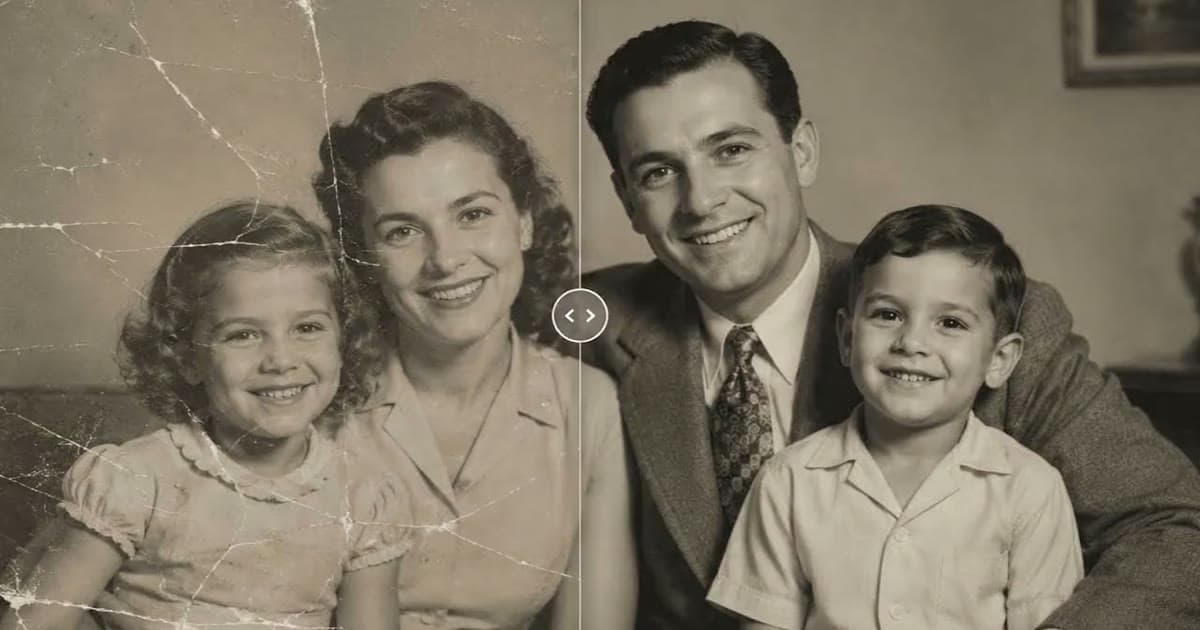
To remove scratches from an old photo, work on a scan and leave the print alone. Clear any loose dust, scan in a way that keeps the scratches faint, then repair them with an AI tool or by hand with clone and healing tools. Afterwards, flip between the two versions to confirm that only the scratches changed.
The step worth slowing down for comes first: telling scratches apart from dust and from damage in the print itself. They look alike on screen, but they need different handling, and one of them you can get rid of before you scan at all.
Scratch, dust or damage in the print: how to tell
Hold the print by its edges under a desk lamp and tilt it slowly. The way each mark behaves tells you what it is.
| What you see as you tilt it | What it is | What to do |
|---|---|---|
| Specks or hairs that sit on top and shift when you blow | Loose dust | Remove it first with an air bulb, not canned air. The Library of Congress warns that even soft brushes can scratch |
| Fine lines that glint, with the picture still intact under them | A surface scratch | A careful scan can make these fainter, then repair what is left |
| White lines or flakes showing bare paper | The image layer has gone | No scan will hide this. A repair has to reconstruct what was there |
| A thin line in the picture, with a smooth surface that does not glint | Damage printed in, often a scratch on the negative | Repair the scan. If you still have the negative, check and scan that too |
Scan so the scratches show less
A surface scratch shows because light catches its edges, so how you light and scan the print changes how much of it you record.
- With a phone, use soft, even light. Daylight from a window with no direct sun works well. Low light from one side throws shadows into every scratch and makes it stand out. Our guide to scanning old photos with your phone covers the rest of the setup.
- On a flatbed, clean the glass and try turning the print. A scanner's lamp lights the print mostly from one direction, so a scratch can look different with the print turned around. Scan it both ways and keep the better one.
- Turn off automatic sharpening in your scanner software. It can turn a faint scratch into a hard line.
- Do not scan far above what you need. The Library of Congress recommends 300 dpi as a starting point for prints, since higher resolution mostly shows defects. On a scratched print, that is what you are trying to avoid.
- Keep your fingers off the image. Handle the print by its edges. Fingerprints can cause permanent stains.
Remove Scratches or Restore: which to choose
Photold has two tools for this, and they share the same physical repair. The difference is what else each one does.
| What it does | Remove Scratches | Restore |
|---|---|---|
| Repairs scratches, dust, creases, tears and stains | Yes | Yes |
| Sharpening | None | Gentle |
| Film grain | Keeps the natural grain | Gentle noise reduction, so grain can soften |
| Palette | Kept | Kept |
| Faded shadows and highlights | Use Restore for this | Recovers faded detail |
- Choose Remove Scratches when the photo is already sharp with good tone, when the grain is part of its character, or when Restore looks too clean for your taste.
- Choose Restore when the scratches come with fading or softness, or with several kinds of damage. Our full guide to restoring old photos helps you name each one.
Neither tool can promise a clean result. Fine detail hidden by a scratch is reconstructed, not recovered, and results vary with the source photo.
Try the repair on a scratched scan, then flip between the two versions to see exactly what changed.Try Photold
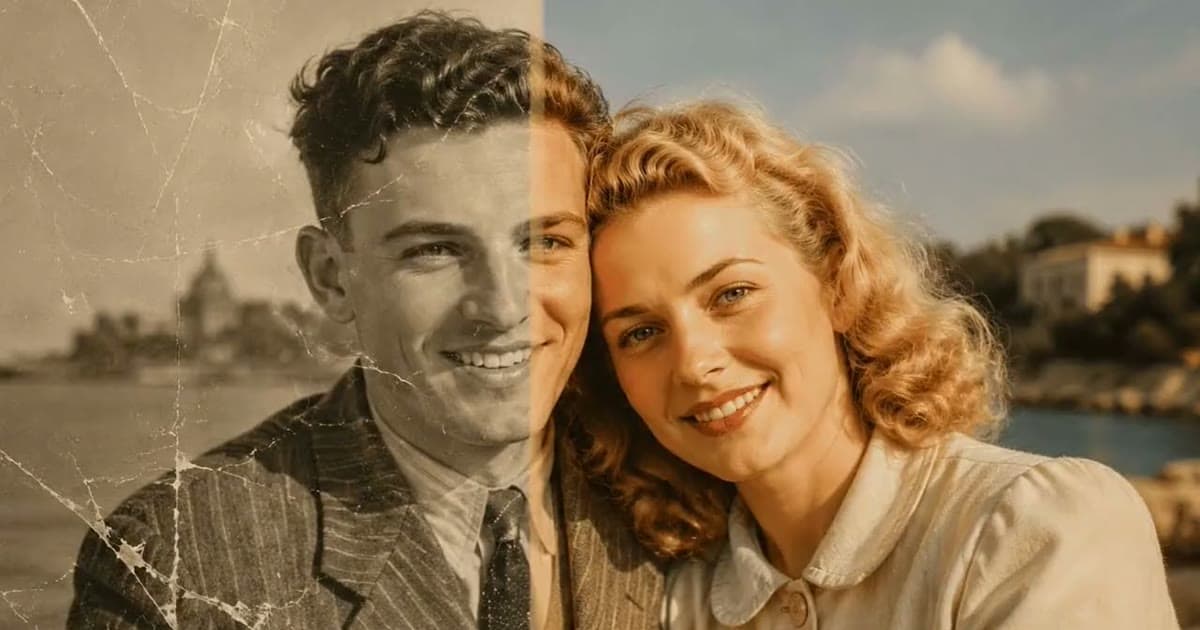
Removing scratches by hand with clone and healing tools
Free image editors have these tools. It is slow work, but you decide every change, which matters on a scratch that crosses a face. For a side-by-side view of the routes, see AI, an image editor or a professional.
- Duplicate the scan so the untouched version stays safe, and work on a new layer if your editor has layers.
- Zoom in until you can see the grain.
- Use the healing tool on smooth areas such as sky, walls and plain clothing. It blends nearby texture into the scratch.
- Use the clone tool where a scratch crosses an edge, such as a jaw or a collar. Sample right next to the scratch, along the same edge.
- Use a brush just wider than the scratch, work in short strokes and resample often. One long stroke repeats a pattern and leaves a visible streak.
- Leave faces for last. Go around the eyes and mouth in tiny steps, and stop sooner than you think you should.
- Zoom out often. A repair that looks fine up close can read as a smooth smudge at normal size, because it has lost its grain.
If a crease or tear runs through the same area, fix that first, since it usually means rebuilding more of the picture.
How to check that nothing else changed
A scratch repair should change the scratches and nothing else. These checks take a few minutes, and they work for any tool.
- The flip test. Open both versions at the same size and zoom, and switch back and forth between them in place. Your eye catches movement. A scratch should vanish, and if an eyelid, a button or a bit of background moves too, something else has changed.
- The difference check. In an editor with layers, put the repair on top of the scan and set the blend mode to Difference. Unchanged areas go close to black, and changes show up as light. You want light only along the scratches. Both files need to be the same pixel size.
- The list. Look at eyes, teeth, moles and hairlines. Then jewelry, buttons and any text. Then the grain in a plain area, and the edges of the frame.
- The person who knew them. They are the best judge of a likeness.
If a face has changed, try the gentler tool or repair that area by hand. Does AI restoration change faces? explains why it can happen.
Frequently asked questions
Can you remove scratches from the physical print?
Not safely at home. A scratch in the image layer cannot be polished out, and home treatments can do lasting harm. Repair a scan, and ask a conservator if the print itself is valuable.
Does removing scratches reduce quality?
A careful repair should not, though it can leave smooth patches where the grain is gone. Photold's Remove Scratches keeps the natural film grain and adds no sharpening.
Should I use canned air to clean a photo before scanning?
No. The Library of Congress recommends an air bulb for loose dust rather than canned air, and warns that even soft brushes can scratch.
Why do scratches look worse after scanning?
Light from one side, very high resolution and automatic sharpening can all make them stand out. Try soft, even light, sharpening off and 300 dpi as a starting point.